Categorize tickets with labels
Labels provide a powerful way to categorize tickets in Enchant. They can be used in folder configurations & automated triggers to help implement custom business workflows. Enchant also provides label based reporting.
You can add and remove labels on a ticket by clicking the Label button in the top action bar from a ticket page or a from bulk action bar on a folder's ticket listing.
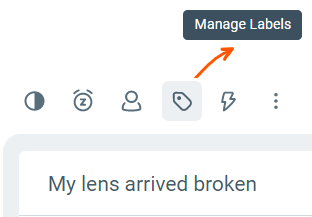
This opens a label panel that shows all the labels that are available in the inbox this ticket belongs to.
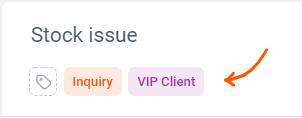
Labels already on the ticket are shown in solid colors, e.g. Replacement label in this screenshot. Labels not on the ticket are shown in translucent colors.
To add or remove a label on the ticket, simply click on the label in the panel. Clicking on solid labels will remove them from the ticket, likewise clicking on the translucent label will add it to the ticket.
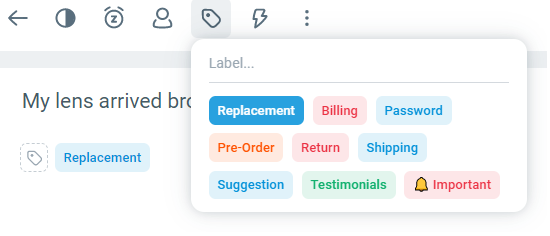
You can also use the input inside the panel to quickly search by label name. This can come in handy if your account has a lot of labels.
You can add and update labels in the settings tab. Each inbox has it's own set of labels but they are automatically shared between inboxes if they have the same name.
From the bottom left corner of the screen, click the cog icon on app navigation bar.

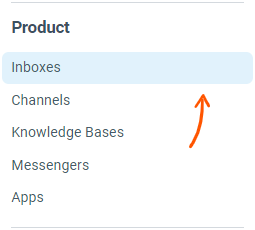
From the sidebar on the left, click on Inboxes option under the Product section:
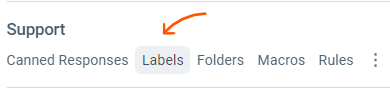
For a specific inbox, click Labels
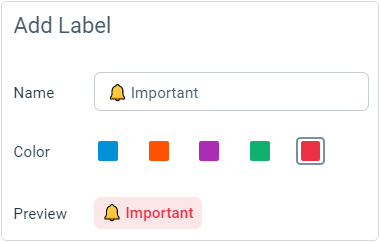
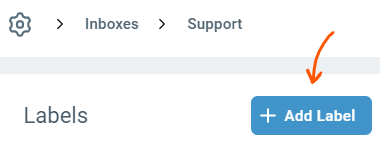
From the top right of the labels page, click the Add Label button.
From here, you can name your label and select a color. You can even add Unicode characters to label names and enhance it with meaningful picture icons.