Setting up knowledge bases
A knowledge base contains your support content. It can either be used to show the content to your customers as a public facing website or to provide internal content for your staff.
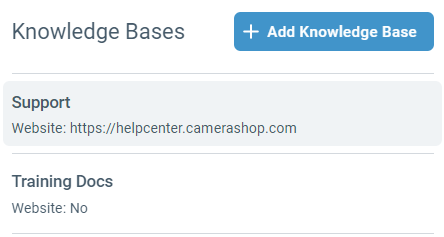
Add and update knowledge bases in the admin area.
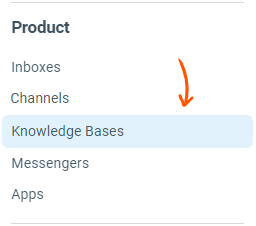
From the bottom left corner of the screen, click the cog icon on app navigation bar.

From the sidebar on the left, click on Knowledge Bases option under the Product section:
Click on the specific knowledge base that you want to edit from the list on the right side.
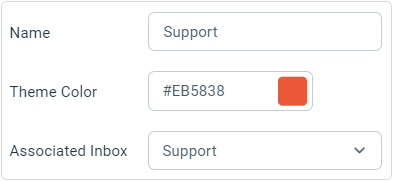
Name: The name of your knowledge base. This name used in the header of the knowledge base website.
Theme Color: The primary color of the links and navigation bars on the website.
Associated Inbox: The knowledge base will only be accessible to members of this inbox. Also, any contact form submissions will head to this inbox. The language of the knowledge base interface is also associated with the language of this inbox. Enchant provides built-in support for 20 languages.
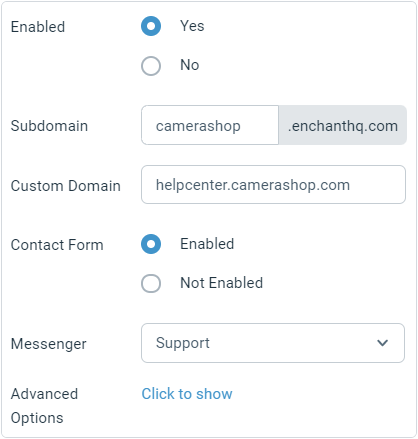
Enabled: The public website is only available if enabled. You can disable this if you're only using an internal knowledge base.
Subdomain: The default address of the help center website.
Custom Domain: If enabled, this will replace the subdomain address. Note that setting a custom domain requires a DNS CNAME entry. Enchant provides SSL on all knowledge bases. It's managed automatically behind the scenes and does not require you to provide us with SSL certificates.
Contact Form: Enable a contact form on the knowledge base or not.
Messenger: Selected messenger widget will be automatically loaded on this knowledge base website.
Advanced Options: Displays advanced website customization options.