Single Sign On via Okta
Note: Single Sign On is available as part of the Advanced Security add-on.
Enchant supports Single Sign On (SSO) via SAML through Okta. In this article, we describe the process of setting up a SAML connection between Enchant and Okta.
- 1
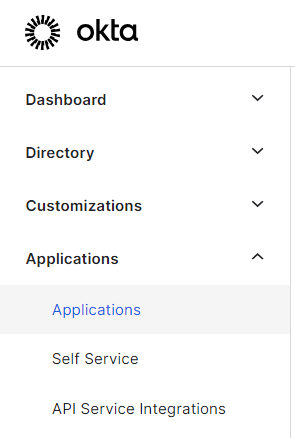
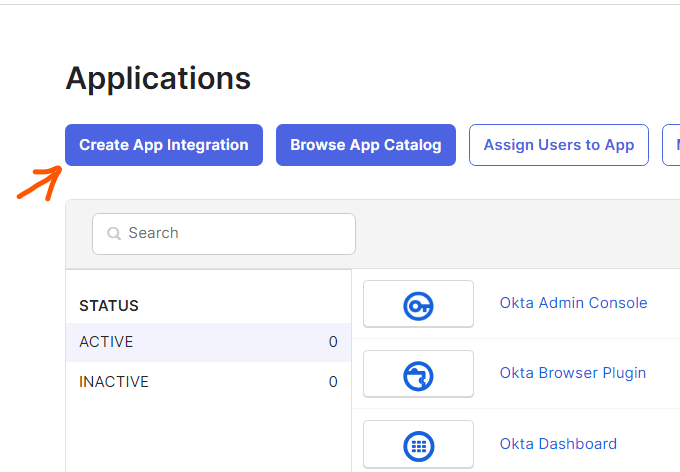
Login to Okta and from the side menu click Applications -> Applications and then click Create App Integration.
Select SAML 2.0 for the Sign in method and click Next
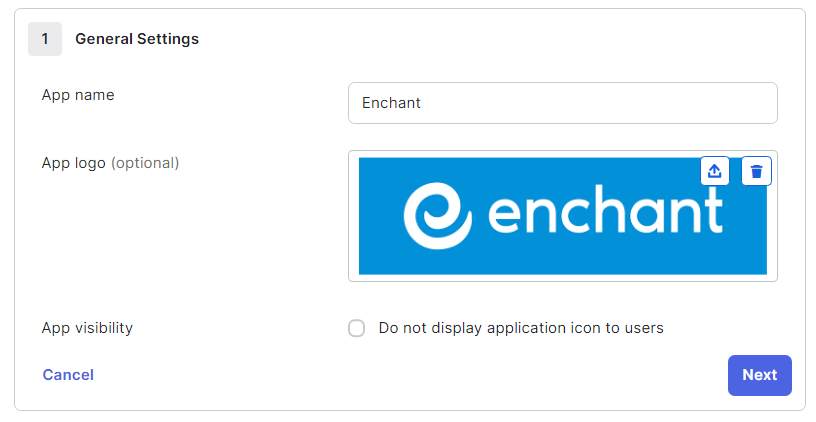
On General Settings, set App Name to Enchant.
Download the Enchant logo from here ( https://www.enchant.com/for-saml/enchant-logo-for-okta.png ) and upload it into App Logo field.
Click Next.
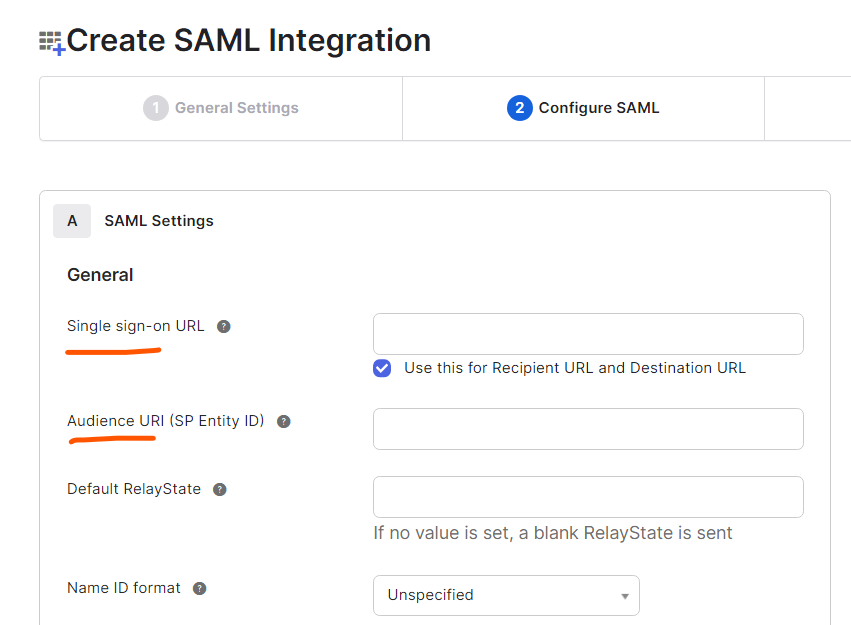
Now on the SAML settings page, Okta requires some information from Enchant.
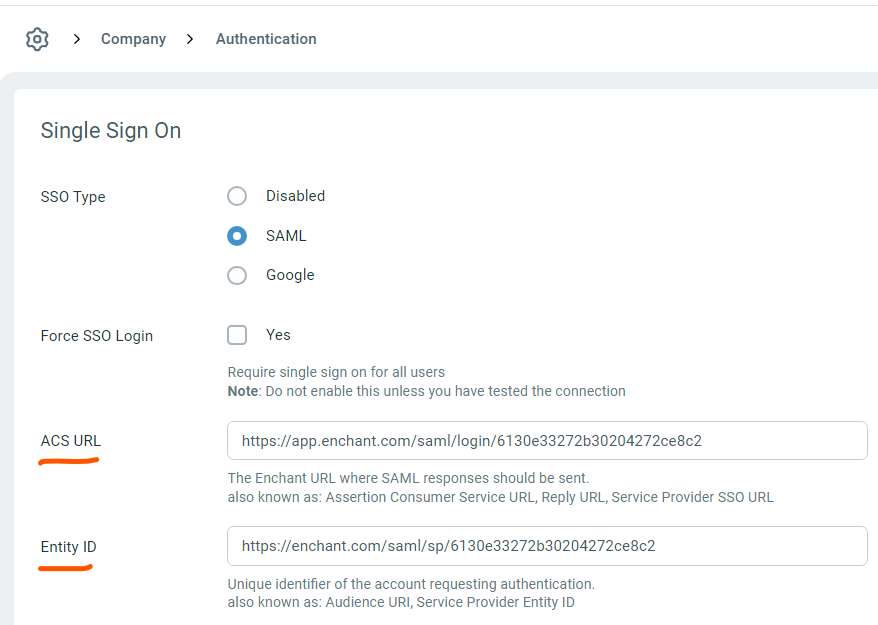
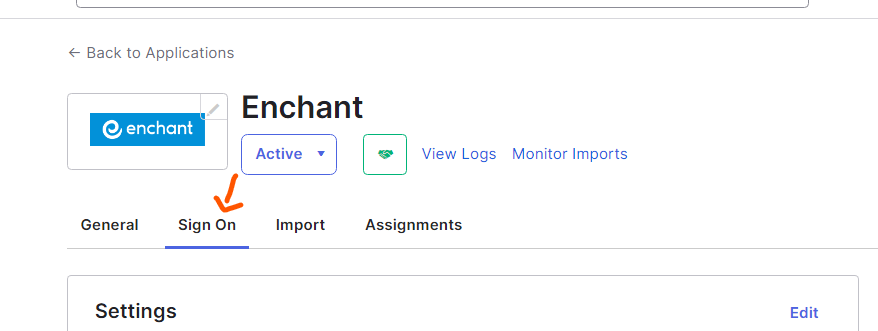
In Enchant, go to Settings -> (Company) Authentication -> Single Sign On (Change Settings). Click on SAML.
Copy the ACS URL from Enchant into the Single sign-on URL field in Okta.
Copy the Entity ID from Enchant into the Audience URI (SP Entity ID) field in Okta.On the Okta settings page, scroll down to Attribute Statements.
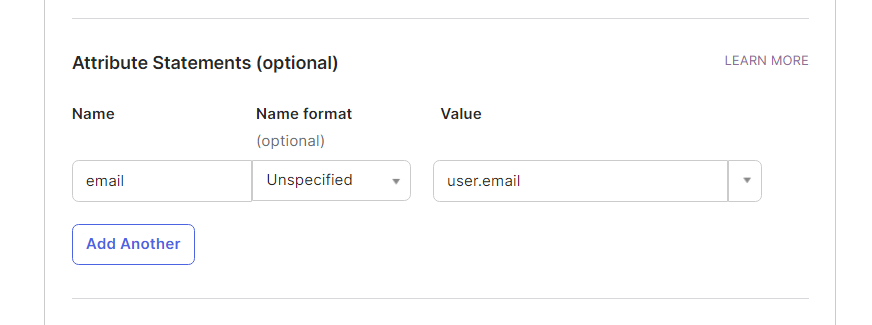
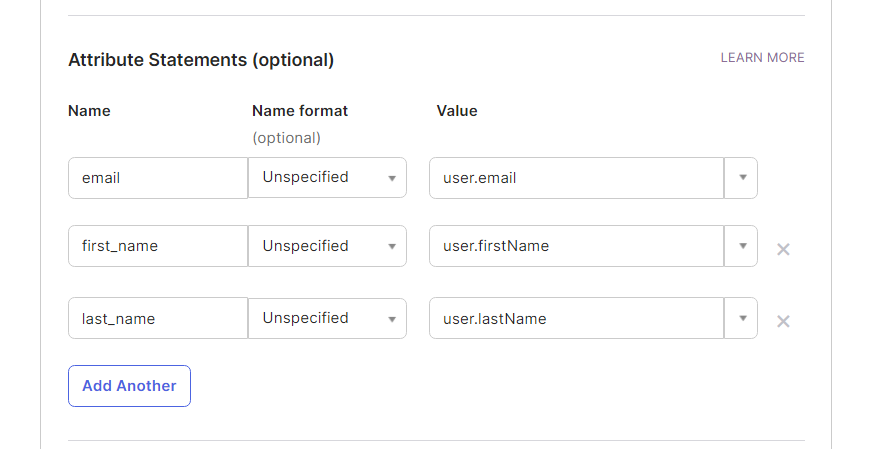
Click in the Name field and type email. From the Value dropdown, select user.email.
Similarly, add an attribute for first_name that maps to user.firstName and last_name that maps to user.lastName.
The attributes section should look like this:
Scroll down to the bottom of the page and click Next.
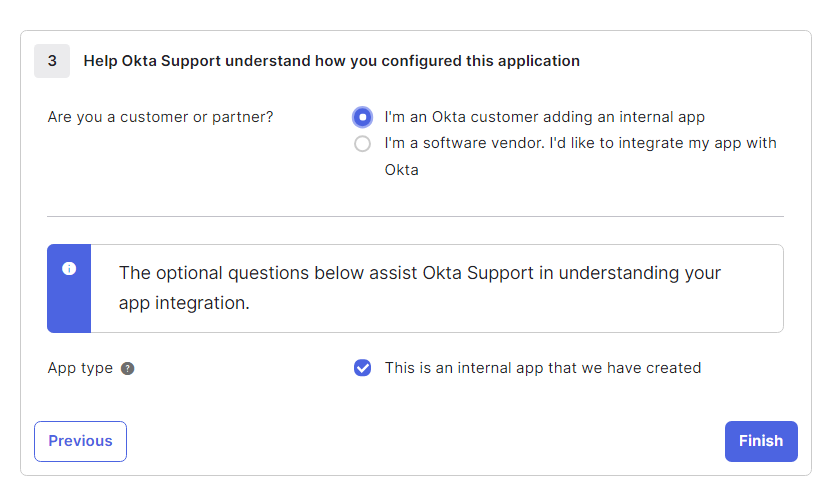
On the next page (Feedback), select the options as shown in the following picture and click Finish.
- 2
In the Okta configuration for the Enchant app, click Assignments. Then select Assign to People under the Assign dropdown.
Click Assign beside the names of the users that should have access to Enchant. Save any changes you make.
- 3
After the Enchant application is setup in Okta, you'll need to copy some information back into Enchant.
First, open up Enchant's SAML configuration screen by going to Settings -> (Company) Authentication -> Single Sign On (Change Settings). Click SAML.
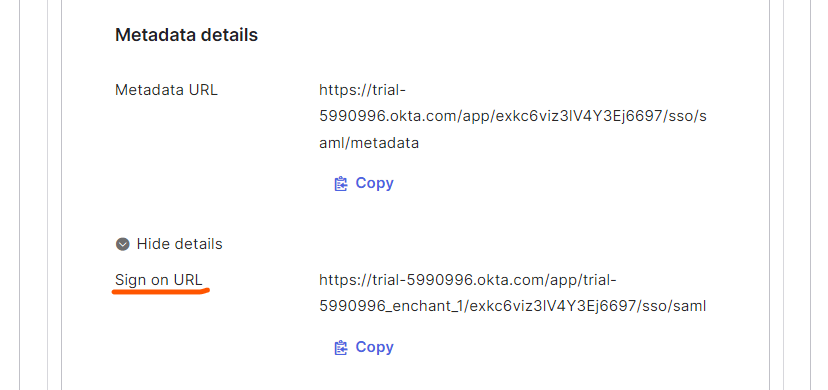
The Sign On URL and Signing Certificate fields need to be copied over from Okta.
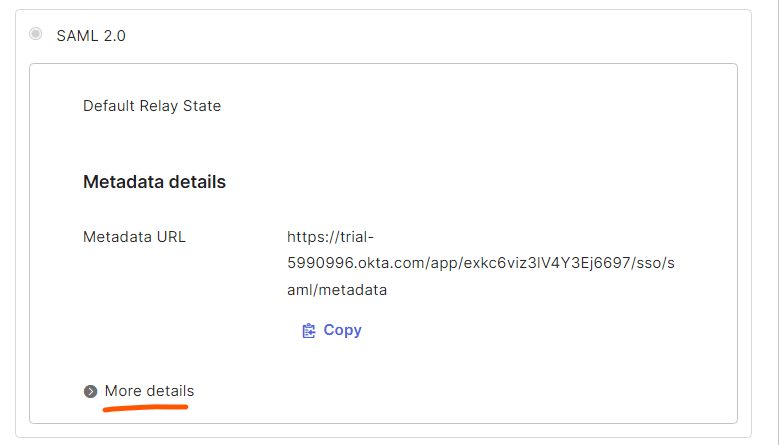
Head over the Sign On tab in the Enchant app configuration in Okta.
Click More details in the SAML 2.0 section:
Copy the Sign on URL from Okta into the Sign On URL field in Enchant.
Scroll down in Okta to the SAML Certificates section. Download the SHA-2 certificate. Open it in a text editor and copy the contents to the Signing Certificate field in Enchant. It should look like this:
-----BEGIN CERTIFICATE----- MIIDqjCCApKgAwIBAgIGAY4fz2wEMA0GCSqGSIb3DQEBCwUAMIGVMQswCQYDVQQGEwJVUzETMBEG A1UECAwKQ2FsaWZvcm5pYTEWMBQGA1UEBwwNU2FuIEZyYW5jaXNjbzENMAsGA1UECgwET2t0YTEU MBIGA1UECwwLU1NPUHJvdmlkZXIxFjAUBgNVBAMMDXRyaWFsLTU5OTA5OTYxHDAaBgkqhkiG9w0B CQEWDWluZm9Ab2t0YS5jb20wHhcNMjQwMzA4MjA0MzMxWhcNMzQwMzA4MjA0NDMxWjCBlTELMAkG FL8F9eEeRhJWEkpY+/JoppQeqQiukK+9yoWEBaV9 -----END CERTIFICATE------ 4
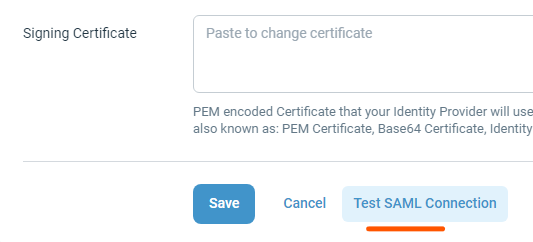
After you save SAML settings, you can test the connection using the Test SAML Connection button on the SAML settings page in Enchant:
This will guide you through a test process where you'll be sent to Azure Entra ID for authentication in a new tab. If you get back into Enchant in the new tab via redirect from Entra ID, then the connection process was successful.