Single Sign On via Azure Entra ID
Note: Single Sign On is available as part of the Advanced Security add-on.
Note: Azure Entra ID was previously known as Azure AD / Azure Active Directory
Enchant supports Single Sign On (SSO) via SAML through Azure Entra ID. In this article, we describe the process of setting up a SAML connection between Enchant and Azure Entra ID.
- 1
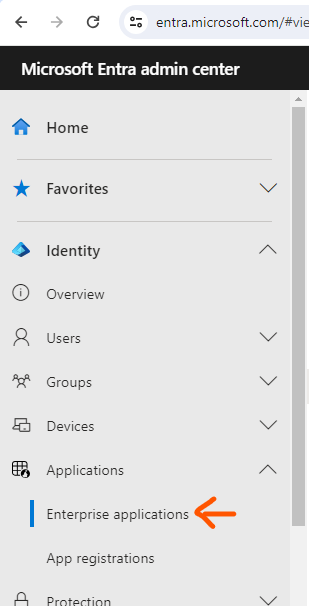
Login to Microsoft Entra admin center and from the side menu click Applications -> Enterprise Applications
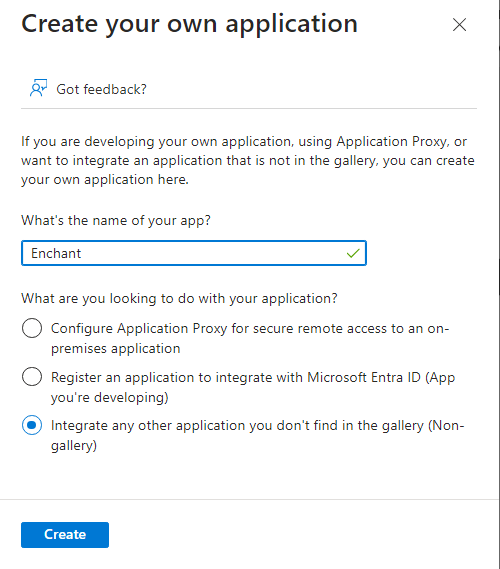
From the top of the screen that opens, click + New application and then + Create your own application
For the name, enter Enchant and then click Create
- 2
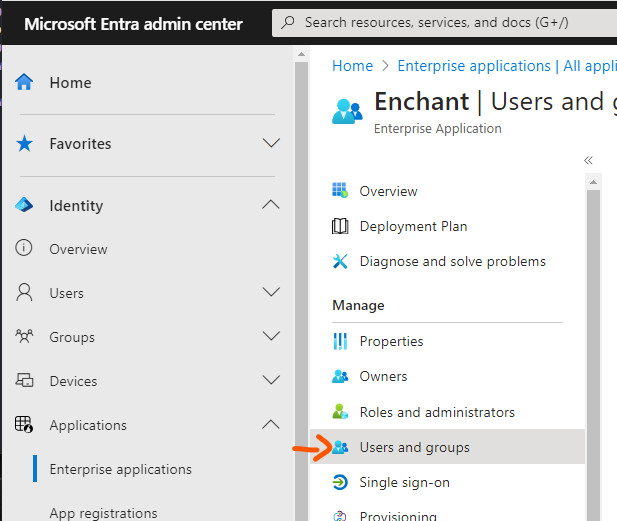
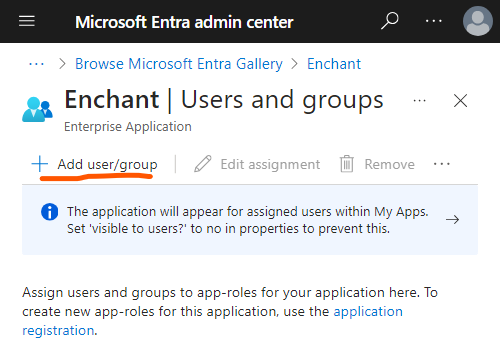
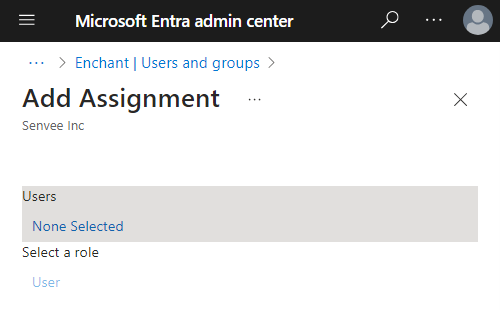
In the Enchant app that was created in Entra, click Users and groups from the side menu and then click + Add user/group
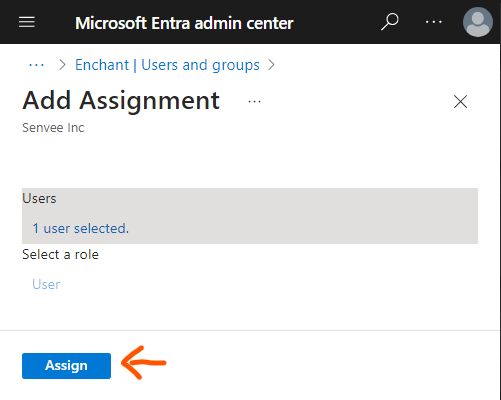
Click on None Selected which will pop up a screen to select a list of users to assign to the Enchant application.
Once you select users, remember to click Assign to actually assign them to the Enchant application.
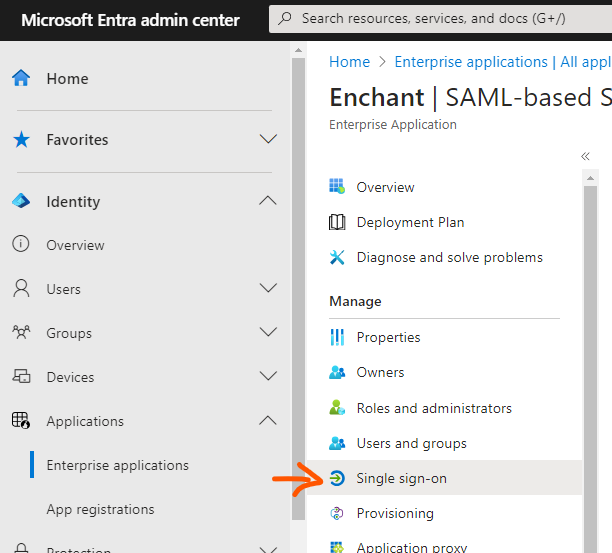
After you assign the users, go back to the Enchant configuration in in Entra ID and then click Single sign-on in the side menu.
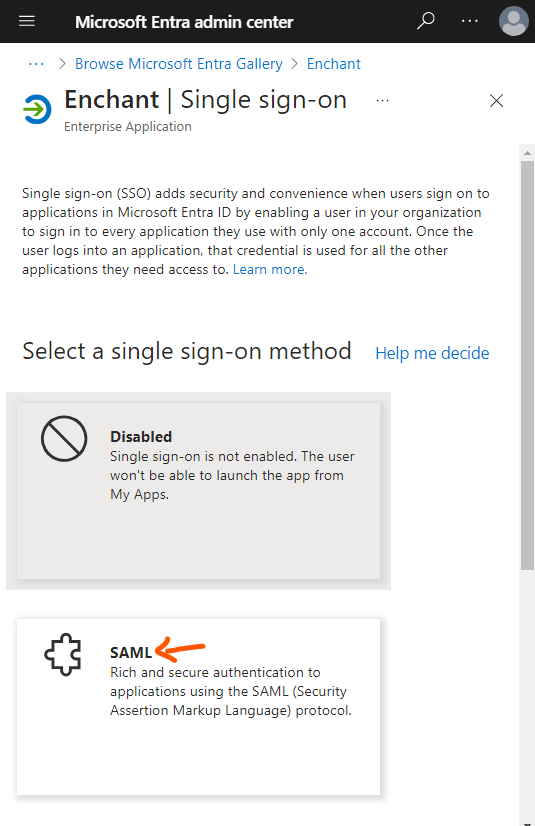
Select SAML for the sign on method.
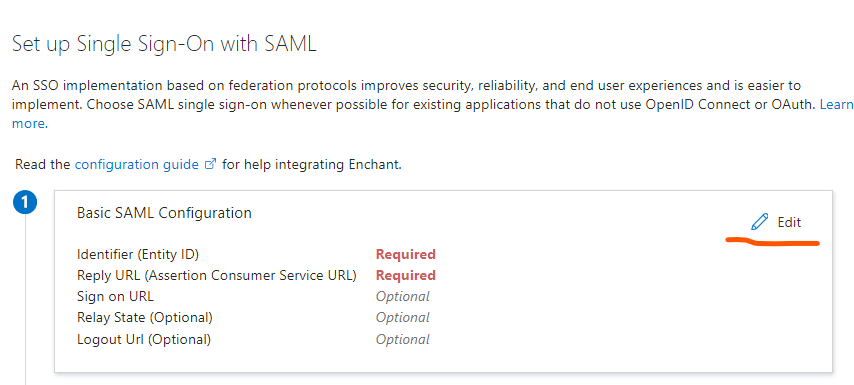
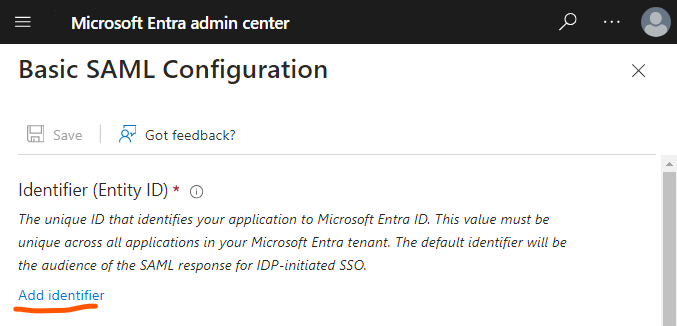
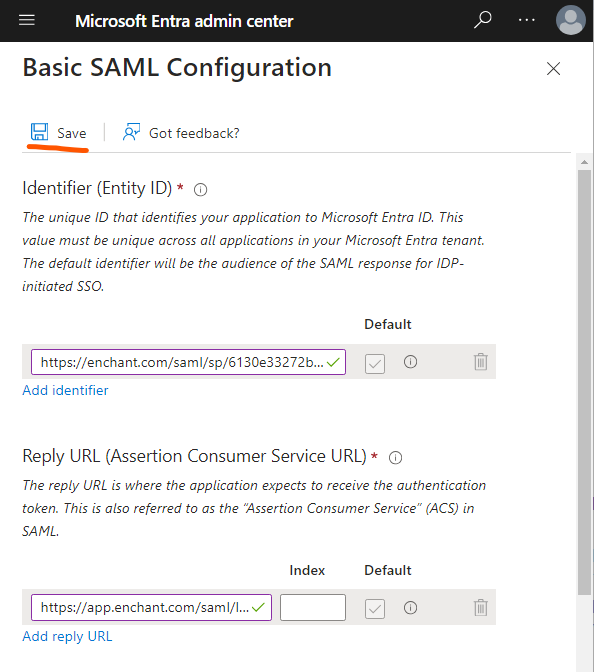
Click Edit under Basic SAML Configuration.
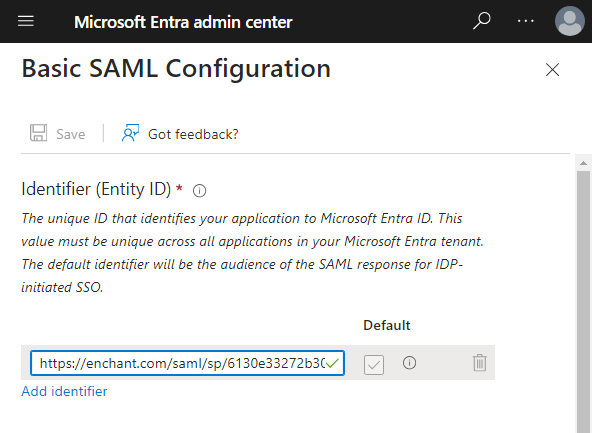
First we're going to setup the Identifier (Entity ID). Click Add identifier under the field.
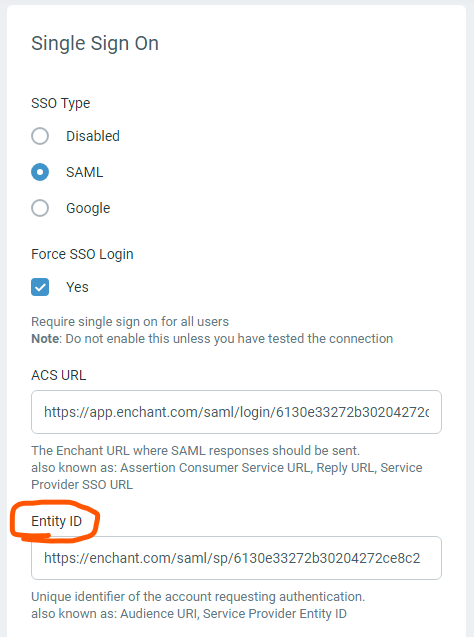
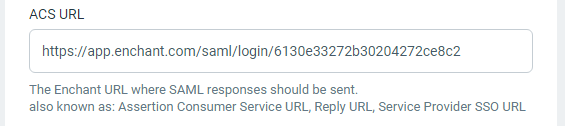
You will need to copy the value of the identifier from Enchant. In Enchant, head to Settings -> (Company) Authentication -> Single Sign On (Change Settings). Click the SAML option on this page. Copy the value of Entity ID and paste it into the Entra ID field for Identifier (Entity ID).
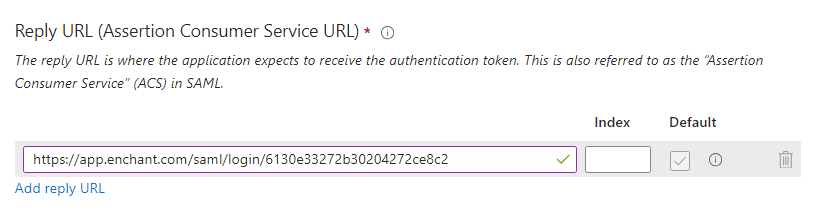
Follow the exact same process to copy the value of ACS URL from Enchant into the Entra ID field for Reply URL (Assertion Consumer Service URL).
Click Save in Entra ID to save this SAML configuration.
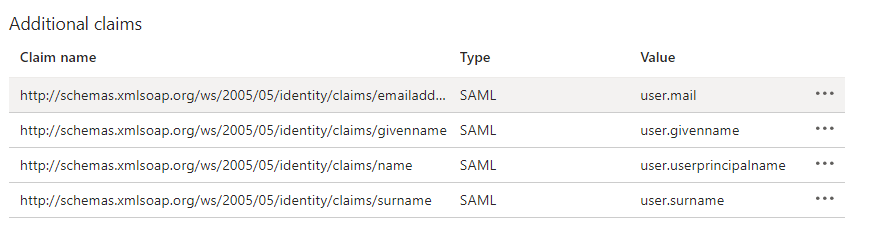
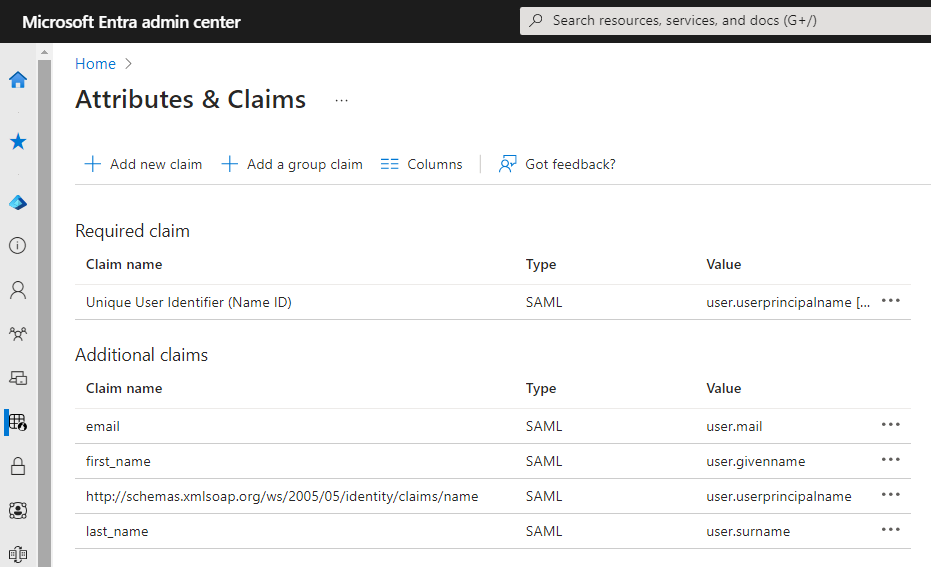
Now click Edit beside Attributes & Claims.
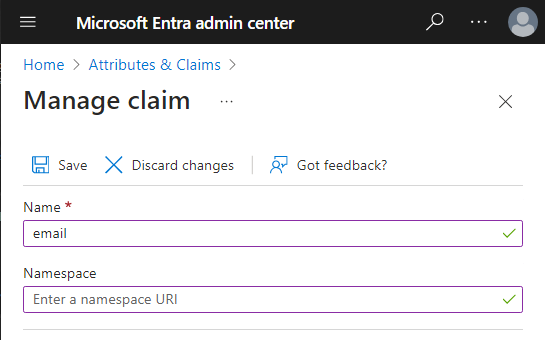
Click on the claim for user.mail
Change the Name to email. Blank out the Namespace. And Save.
It should look like this before saving:
Follow the same process to change the name of user.givenname to first_name.
And again to change the name of user.surname to last_name.
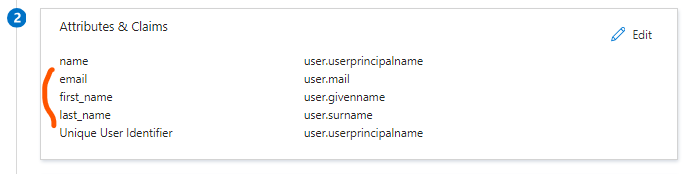
In both cases, remember to remove the Namespace.After saving, the Attributes & Claims should look like this:
Now work your way back to the SAML overview page, and it will look like this:
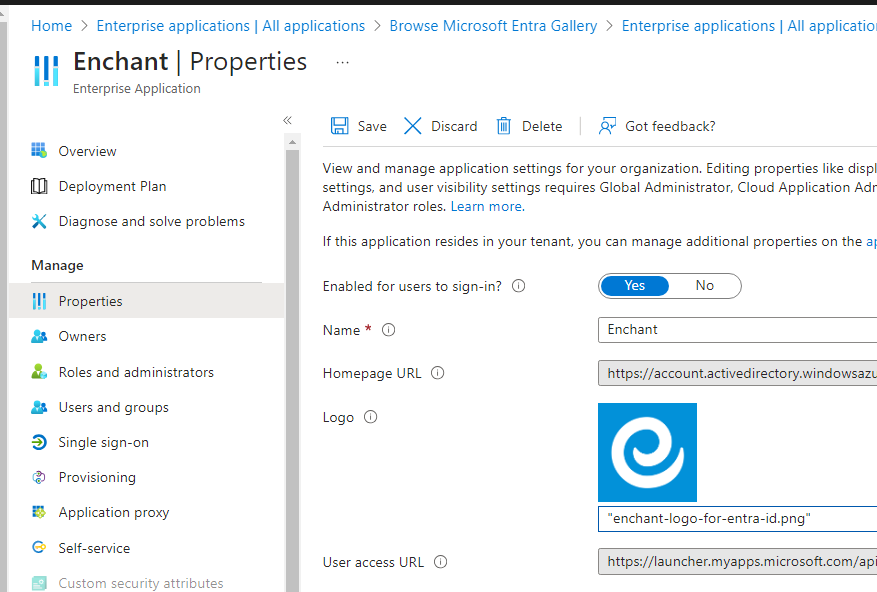
Now, we're going to setup the Enchant logo in Entra ID.
Head to Properties in the Enchant application settings in Entra ID.
Download the Enchant logo from here ( https://www.enchant.com/for-saml/enchant-logo-for-entra-id.png ) and upload it into the logo field on this properties page.
- 3
After the Enchant application is setup in Azure Entra ID, you'll need to copy some information back into Enchant.
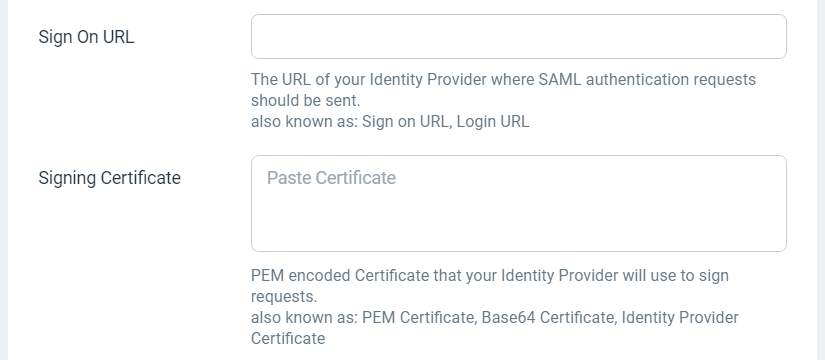
First, open up Enchant's SAML configuration screen by going to Settings -> (Company) Authentication -> Single Sign On (Change Settings). Click SAML.
The Sign On URL and Signing Certificate fields need to be copied over from Entra ID.
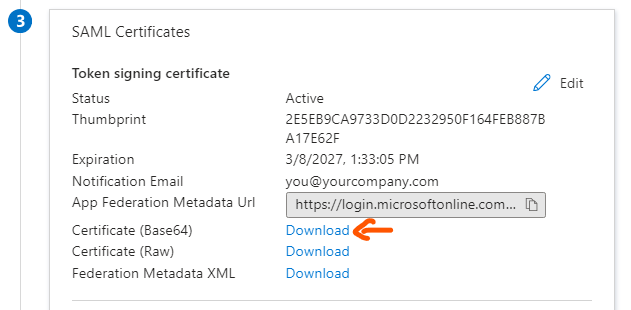
For the Signing Certificate, go to the SAML settings for the Enchant app in Entra ID and scroll down to the SAML Certificates section. Click Download beside the Certificate (Base64):
Open this file in a text editor and copy the certificate into the Signing Certificate field in Enchant. It will look like this:
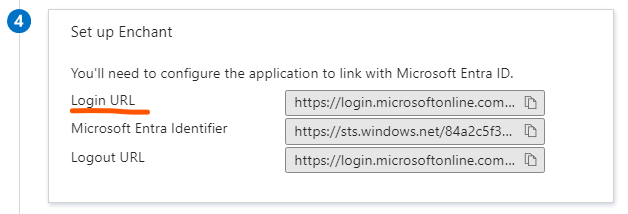
-----BEGIN CERTIFICATE-----
MIIC8DCCAdigAwIBAgIQb7VuQiI3rpJPyNUO3yak6jANBgkqhkiG9w0BAQsFADA0MTIwMAYDVQQD
EylNaWNyb3NvZnQgQXp1cmUgRmVkZXJhdGVkIFNTTyBDZXJ0aWZpY2F0ZTAeFw0yNDAzMDExODQ1
NDFaFw0yNzAzMDExODQ1NDVaMDQxMjAwBgNVBAMTKU1pY3Jvc29mdCBBenVyZSBGZWRlcmF0ZWQg
lR3vCU7SlqhDbZG4jDDyvrydHt3rW4mFhGP+VqzlQI0T5tR5b2eKj1b2V6Oo6qAKYxT+ikj9nSXu
bS2swZd/rkK/ESVEUj5Y
-----END CERTIFICATE-----
For the Sign On URL, go to the SAML settings for the Enchant app in Entra ID and scroll down to the Set up Enchant section. Copy the value of Login URL in Entra ID to the Sign On URL field of Enchant.
- 4
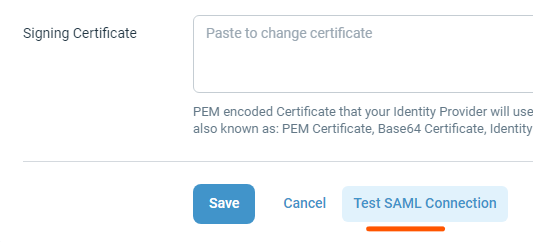
After you save SAML settings, you can test the connection using the Test SAML Connection button on the SAML settings page in Enchant:
This will guide you through a test process where you'll be sent to Azure Entra ID for authentication in a new tab. If you get back into Enchant in the new tab via redirect from Entra ID, then the connection process was successful.